Amplify のベース作成
Amplify のアカウントが Cloud9 で設定できたので、今回の Amplify のベースを作成します。
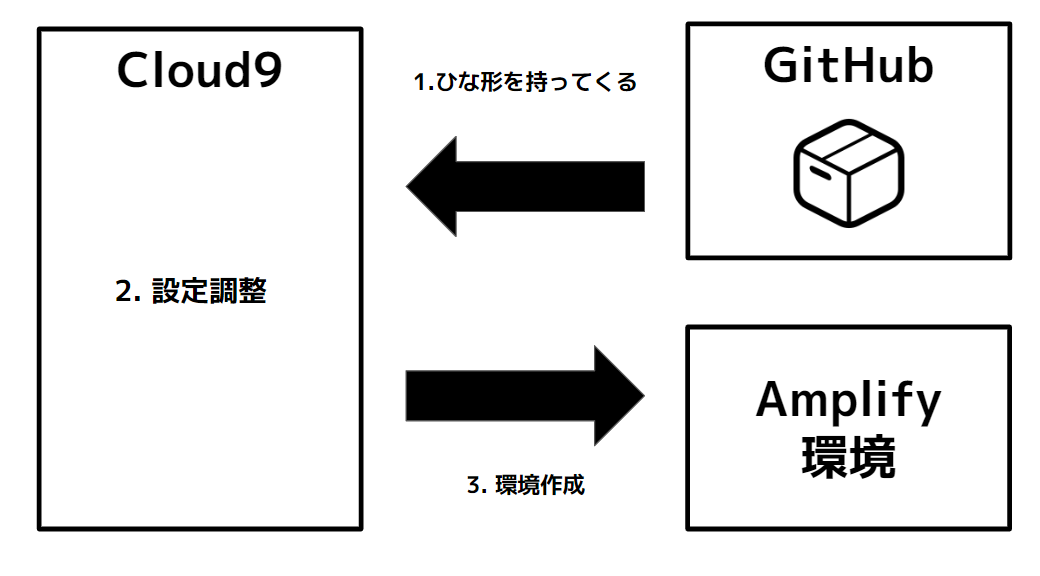
まず、GitHub から Amplify Studio + Figma が出来る、React 環境の初期設定と Amplify を扱うための GraphQL と API の設定が完了しているひな形を持ってきます。
その後、みんな同名で Amplify 環境をつくることのないよう、環境名を設定調整して、そのひな形を元に Cloud9 から Amplify 環境を構築します。
データを持ってくる クローン
git clone https://github.com/1ft-seabass/amplify-homes-handson-sample-202208.git
このコマンドを実行します。
Cloning into 'amplify-homes-handson-sample-202208'...
remote: Enumerating objects: 65, done.
remote: Counting objects: 100% (35/35), done.
remote: Compressing objects: 100% (31/31), done.
remote: Total 65 (delta 11), reused 4 (delta 4), pack-reused 30
Receiving objects: 100% (65/65), 850.59 KiB | 7.40 MiB/s, done.
Resolving deltas: 100% (11/11), done.
このような実行結果になります。
フォルダの移動
cd amplify-homes-handson-sample-202208
このコマンドを実行して、作業するフォルダをクローンされた amplify-homes-handson-sample-202208 フォルダに移動します。
<みなさんそれぞれのユーザー名>:~/environment/amplify-homes-handson-sample-202208 (master) $
ターミナルでこのように、カレントディレクトリが ~/environment/amplify-homes-handson-sample-202208 となっていることを確認して進めましょう。
npm インストール
npm i
このコマンドを実行します。現在の環境のモジュール一式をインストールします。
これを忘れると、あとで amplify publish あたりで /tmp/build-0d70d1c9.sh: line 1: react-scripts: command not found エラーが出るので、忘れないようにしましょう。
Amplify 環境の初期設定
まず自分の環境の名前(英数字)を思い出す
このあと、みなさん、それぞれの環境で Amplify を作成します。
まず自分の環境の名前(英数字)を思い出しましょう。
私の場合は tanaka-seigo としました。
このあとこれを自分の環境の名前として使っていきましょう。
環境名変更
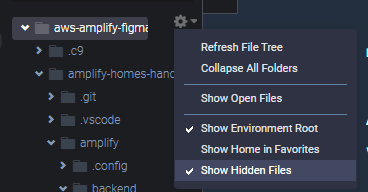
ファイルツリーで Show Hidden Files をオンにします。
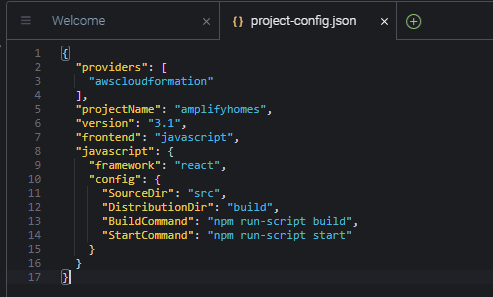
amplify/.config/project-config.json をダブルクリックしてエディタで開きます。
(画像)
projectName の amplifyhomes に自分の名前の略称を加えて保存します。tanaka-seigo の場合は amplifyhomes-tanaka-seigo とします。
環境名変更はこれで完了です。
ここでコマンドの中断 Ctrl + C も伝えられたら伝える
設定開始
amplify init
このコマンドを実行します。対話式でコマンドが進みます。
Enter a name for the environment (dev)
環境の名前を入力してくださいと聞かれます。これは dev のままで良いのでそのまま Enter キーを押します。
今回の Amplify 環境の「配下で」開発するときの、開発用の環境の名前です。
? Choose your default editor: (Use arrow keys)
デフォルトのエディタを聞かれます。
? Choose your default editor: (Use arrow keys)
❯ Visual Studio Code
  Android Studio
  Xcode (macOS only)
  Atom Editor
  Sublime Text
  IntelliJ IDEA
  Vim (via Terminal, macOS only)
(Move up and down to reveal more choices)
Visual Studio Code を選択して Enter キーを押します。
? Select the authentication method you want to use: (Use arrow keys)
使用する認証方法を選択します。
? Select the authentication method you want to use: (Use arrow keys)
❯ AWS profile
  AWS access keys
AWS profile を選択して Enter キーを押します。
Please choose the profile you want to use (Use arrow keys)
使用するプロファイルを選択します。
? Please choose the profile you want to use (Use arrow keys)
❯ default
これは、 aws configure のときに、設定した default という名前のプロファイルを使うので、 default を選択して Enter キーを押します。
環境作成中
すると、Amplify 環境が作成されます。
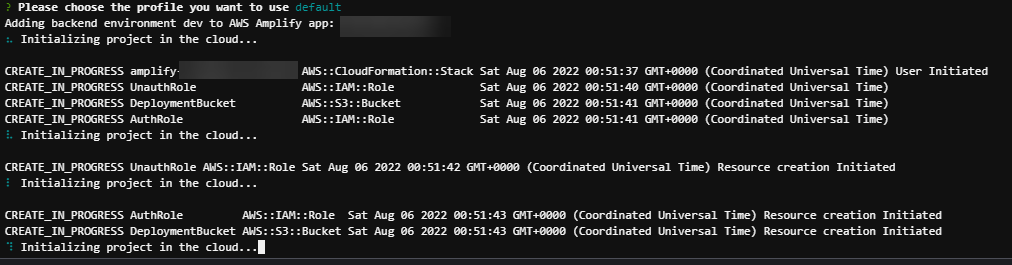
しばらく待ちましょう。
作成完了
✔ Initialized provider successfully.
✅ Initialized your environment successfully.

Your project has been successfully initialized and connected to the cloud!

Some next steps:
"amplify status" will show you what you've added already and if it's locally configured or deployed
"amplify add <category>" will allow you to add features like user login or a backend API
"amplify push" will build all your local backend resources and provision it in the cloud
"amplify console" to open the Amplify Console and view your project status
"amplify publish" will build all your local backend and frontend resources (if you have hosting category added) and provision it in the cloud
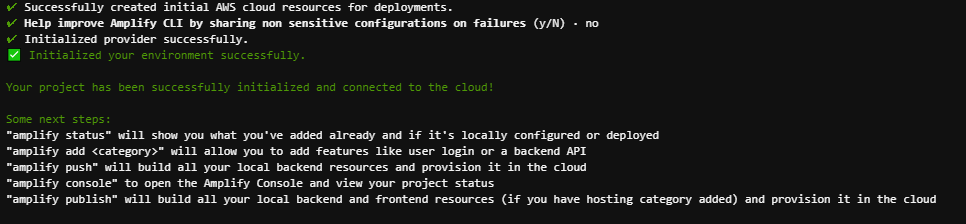
作成が完了しました。
Cloud9 に環境ができたか確認
amplify status
このコマンドを実行します。
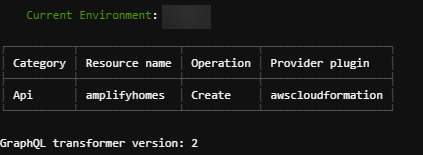
このような表示が出れば OK です。
ホスティング準備
amplify hosting add
このコマンドを実行します。手元の Cloud9 でホスティングするための設定を行います。
Select the plugin module to execute … (Use arrow keys or type to filter)

Hosting with Amplify Console (Managed hosting with custom domains, Continuous deployment) を選択して Enter キーを押します。
Choose a type (Use arrow keys)
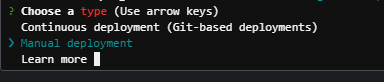
Manual deployment を選択して Enter キーを押します。
Amplify 環境の公開(amplify publish)
You can now publish your app using the following command:

Command: amplify publish
Cloud9 の手元でホスティングが完了し、このようなメッセージが表示されます。
amplify publish
このコマンドを実行します。Amplify 環境の公開を行います。
Are you sure you want to continue? (Y/n)
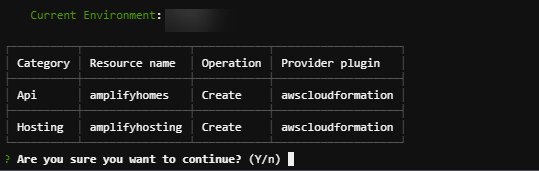
このまま続けるか聞かれるので Y を入力して Enter キーを押します。
Do you want to update code for your updated GraphQL API (Y/n)
更新された GraphQL API のコードを更新するか聞かれるので、更新しないので N を入力して Enter キーを押します。
No 重要です~。
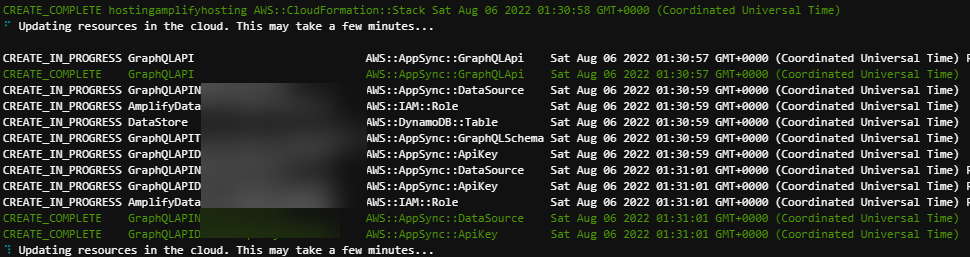
いろいろなものが設定・作成されるので待ちます。
[DEP0148] DeprecationWarning がでますが、気にしないで大丈夫です。待ちます。
✔ All resources are updated in the cloud
GraphQL endpoint: https://***************.appsync-api.ap-northeast-1.amazonaws.com/graphql
GraphQL API KEY: ***************
GraphQL transformer version: 2
Publish started for amplifyhosting
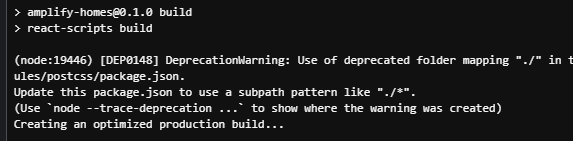
> amplify-homes@0.1.0 build
> react-scripts build
(node:9268) [DEP0148] DeprecationWarning: Use of deprecated folder mapping "./" in the "exports" field module resolution of the package at /home/ec2-user/environment/amplify-homes-handson-sample-202208/node_modules/postcss-safe-parser/node_modules/postcss/package.json.
Update this package.json to use a subpath pattern like "./*".
(Use `node --trace-deprecation ...` to show where the warning was created)
Creating an optimized production build...
このようにサーバー側の設定が終わり、フロントエンドの表示側のデプロイがはじまります。
✔ Zipping artifacts completed.
✔ Deployment complete!
https://********.****************.amplifyapp.com
と表示されたらデプロイ成功です!
https://********.****************.amplifyapp.com をクリックして Open をクリックしてブラウザの別のタブで開いてみましょう。
一旦は真っ白で大丈夫です。
エラーメモ

Publish started for amplifyhosting

> amplify-homes@0.1.0 build
> react-scripts build

sh: react-scripts: command not found
Publish started for amplifyhosting

> amplify-homes@0.1.0 build
> react-scripts build

(node:18175) [DEP0148] DeprecationWarning: Use of deprecated folder mapping "./" in the "exports" field module resolution of the package at /home/ec2-user/environment/amplify-homes-handson-sample-202208/node_modules/postcss-safe-parser/node_modules/postcss/package.json.
Update this package.json to use a subpath pattern like "./*".
(Use `node --trace-deprecation ...` to show where the warning was created)
Creating an optimized production build...
Amplifyのベース作成は完了です!