Unity プロジェクトを一から作ってみよう
Unity プロジェクトの準備
このページでは、まず Unity プロジェクトを準備します。
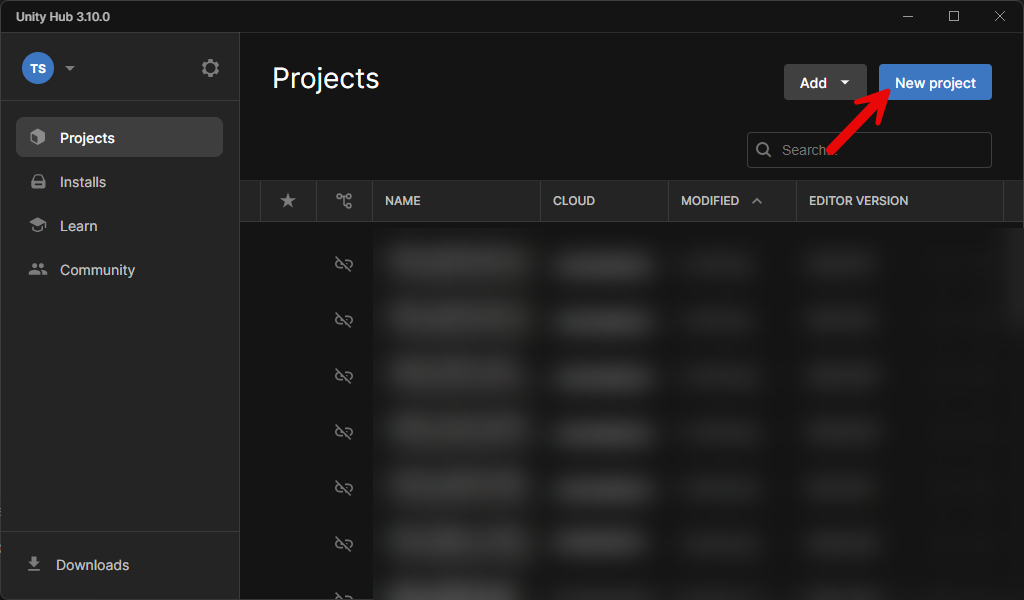
Unity Hub を起動して、右上の New Project ボタンをクリックします。
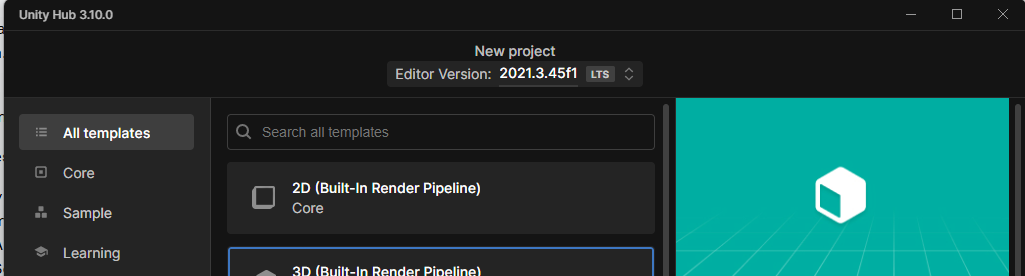
Editor Version を今回インストールした 2021.3 LTS を選択します。
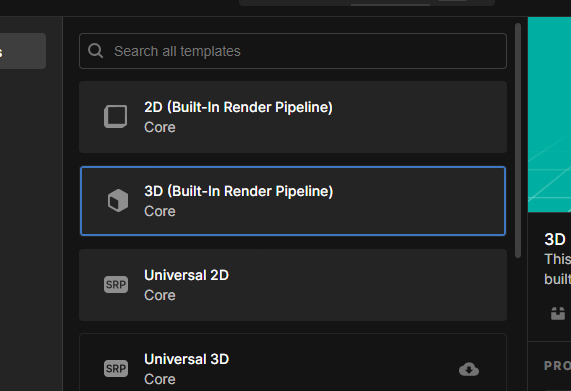
3D (Build-in Render Pipeline) を選択します。
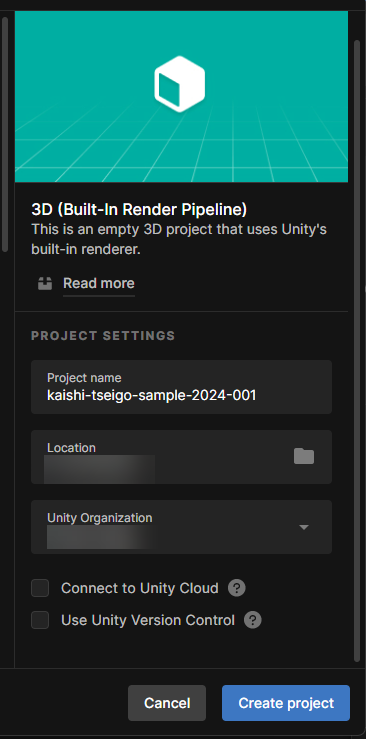
右側の詳細設定は
- ProjectName
- kaishi-tseigo-sample-2024-001
- Location
- デスクトップ
- Unity Organization
- 自分のアカウント
- Connect to Unity Cloud
- チェックを外す
- Use Unity Version Control
- チェックを外す
と設定できたら Create project をクリックします。
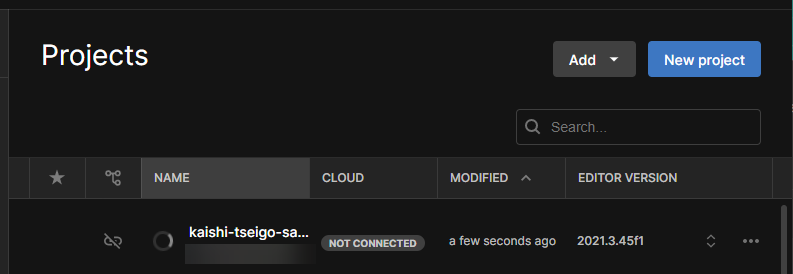
プロジェクトが作成されます。
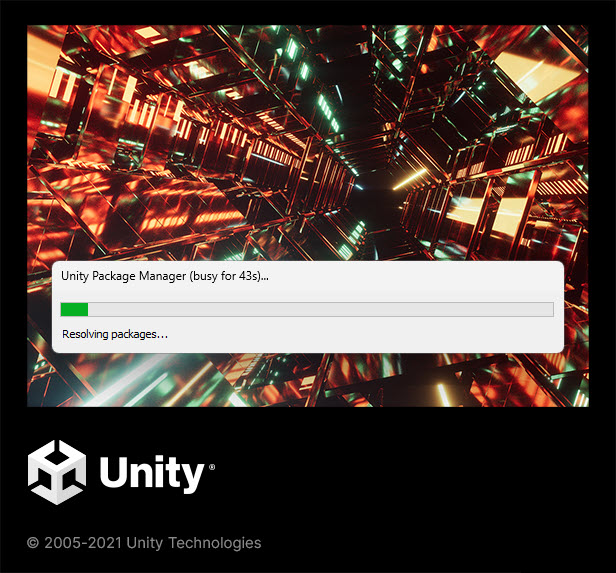
待ちます。
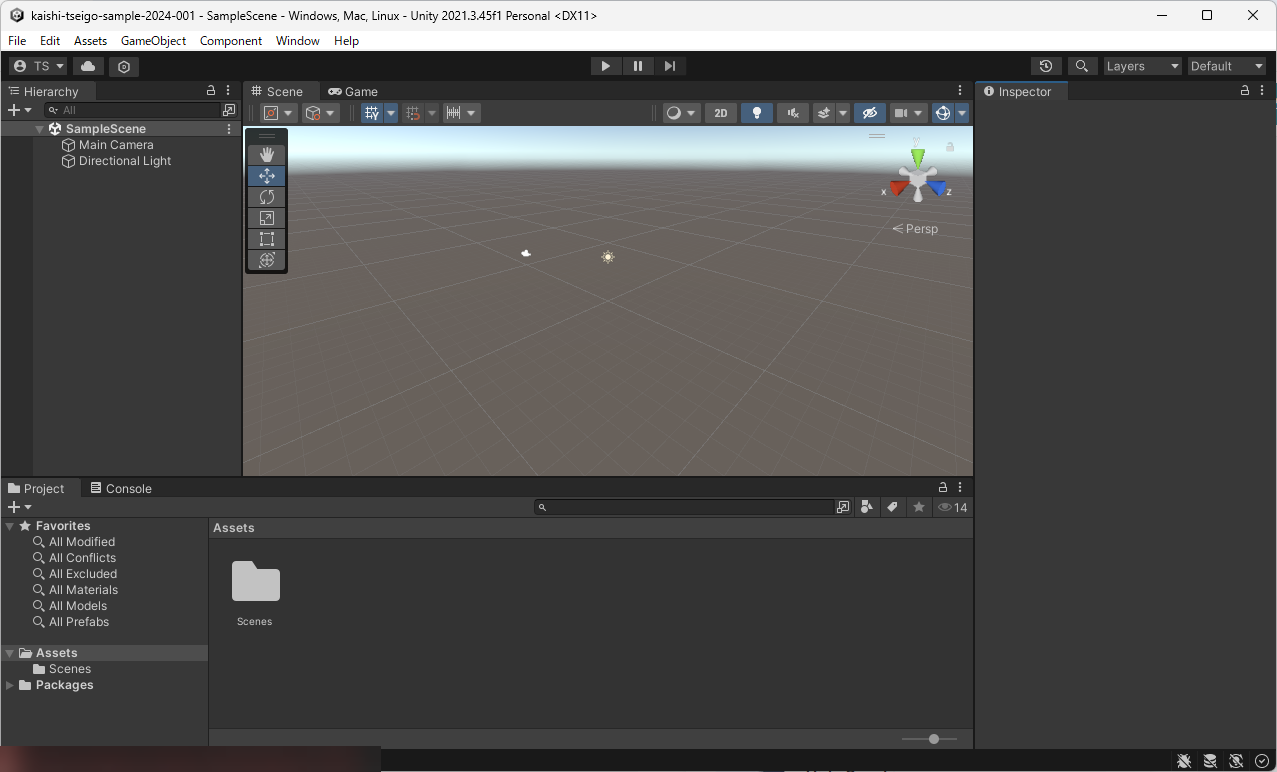
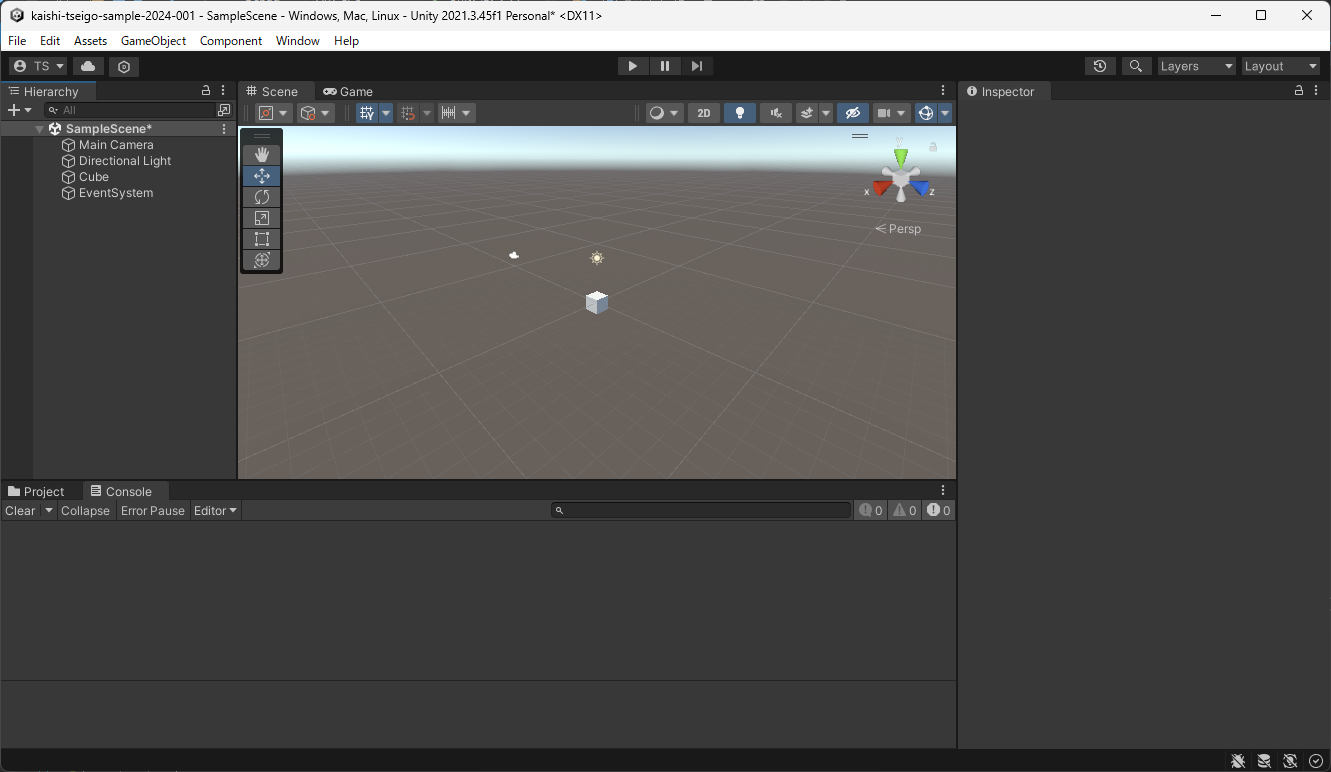
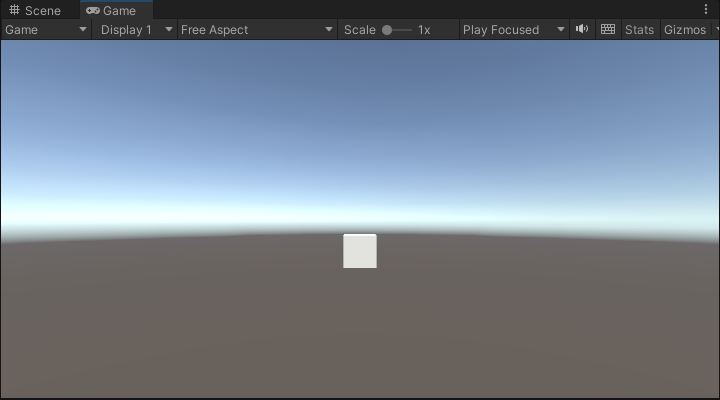
SampleScene が起動しました。
ベースとなる記事
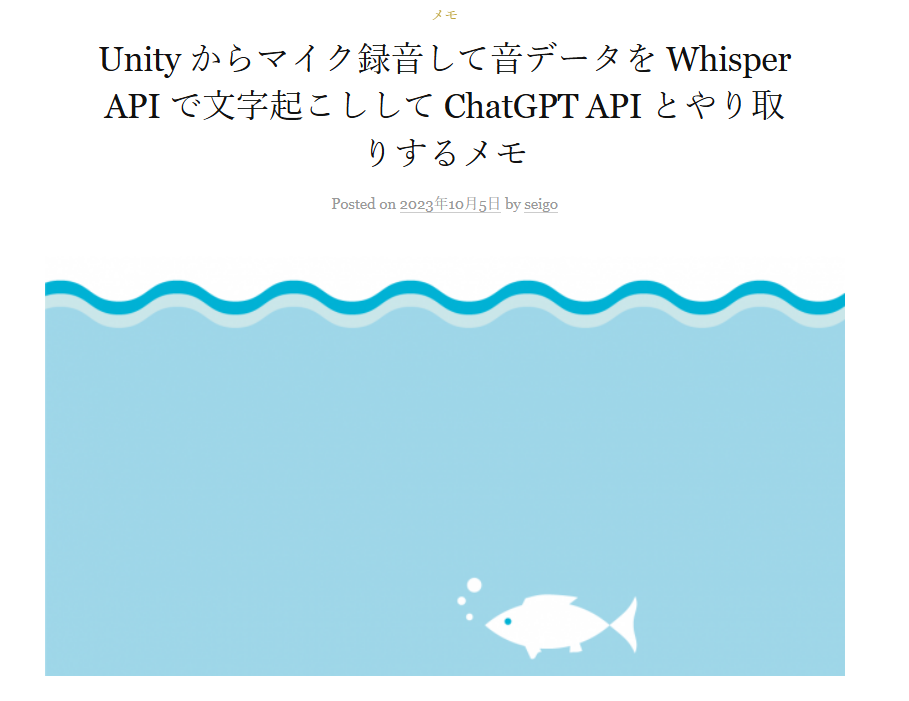
こちらの記事をベースに進めます。
- Unity からマイク録音して音データを Whisper API で文字起こしして ChatGPT API とやり取りするメモ – 1ft-seabass.jp.MEMO
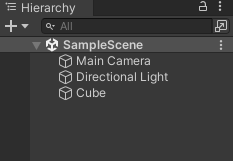
Cube を配置
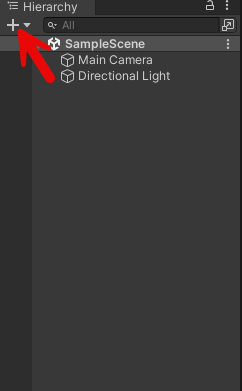
Hierarchy に注目して右上の+ボタンをクリックします。

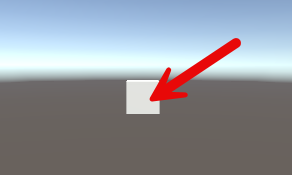
Cube が配置されました。
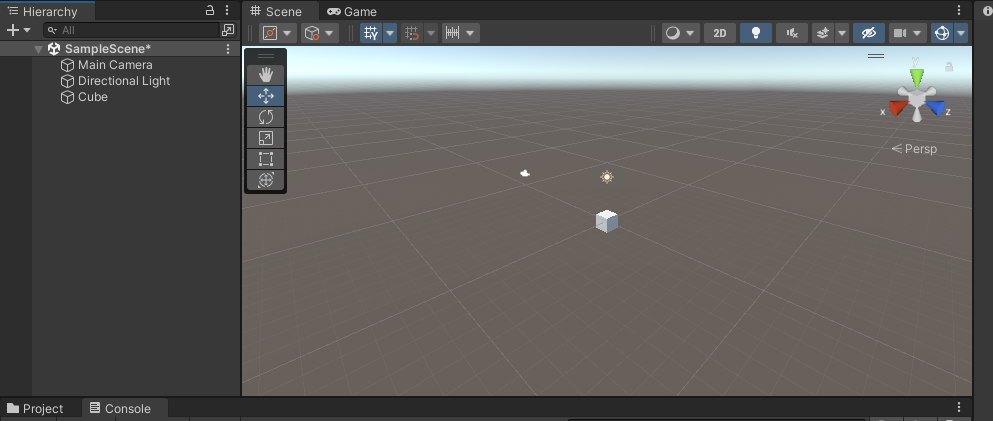
Scene タブで Cube が配置されたことも確認します。
Physics Raycaster を Main Camera に設置
Cube でクリックしたイベントを取得すために Physics Raycaster を Main Camera に設置します。
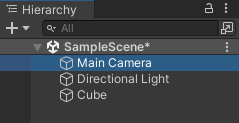
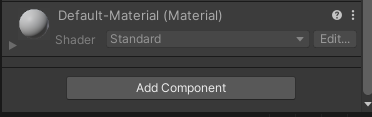
Main Camera をクリックして選択します。
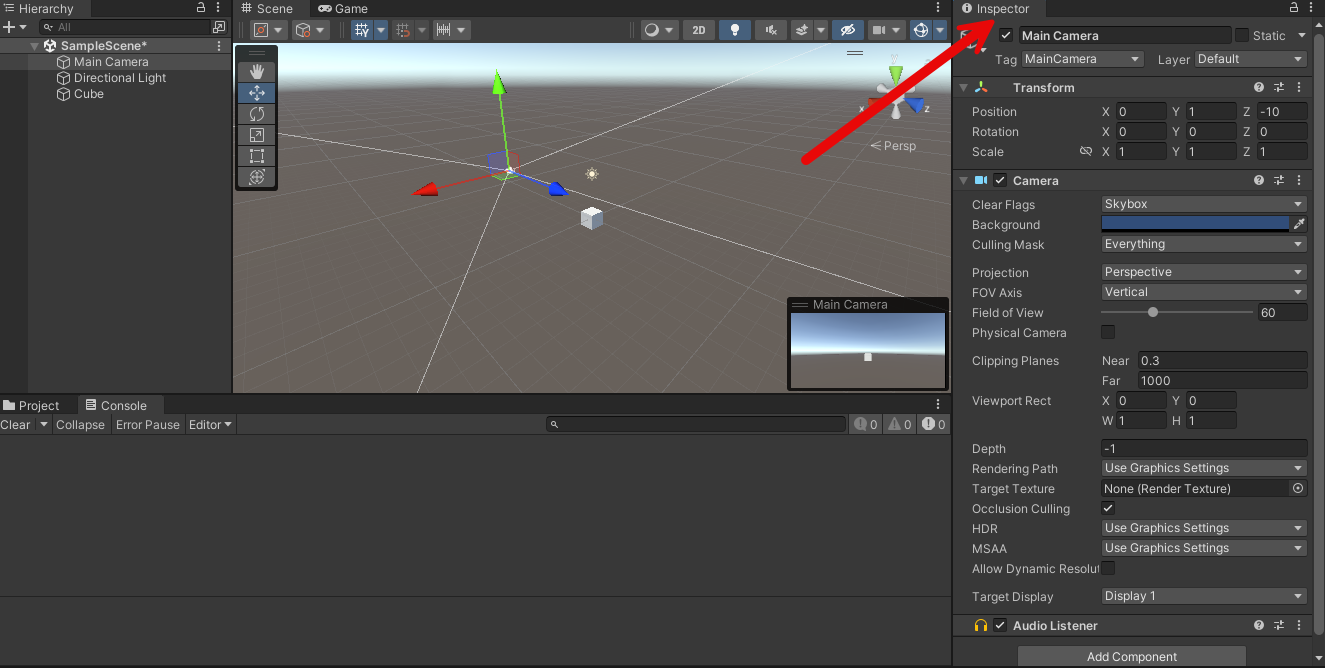
Inspector に注目します。
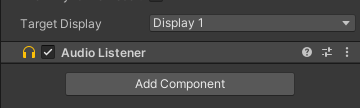
Add Component をクリックします。
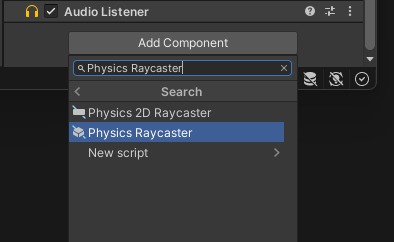
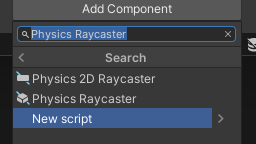
Physics Raycaster を検索エリアで検索してみて Physics Raycaster を選択します。
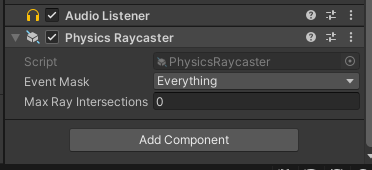
無事加わったことを確認します。
Event System を配置
Hierarchy に注目して右上の+ボタンをクリックします。
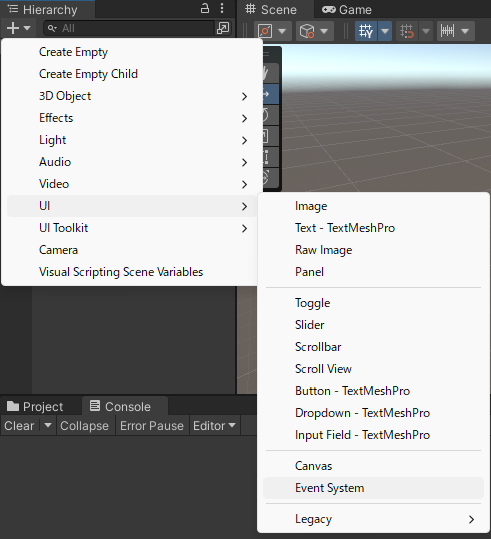
UI > Event System を選択します。
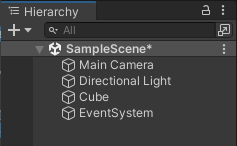
配置を確認します。名前はそのままで OK です。
Cube にスクリプトを割り当てる
今回の OpenAI Whisper API でマイク録音したものを文字起こしして、そのテキストで OpenAI ChatGPT に質問する仕組みを Cube に Cube Event としてスクリプトを割り当てます。
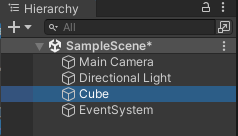
Cube をクリックして選択します。
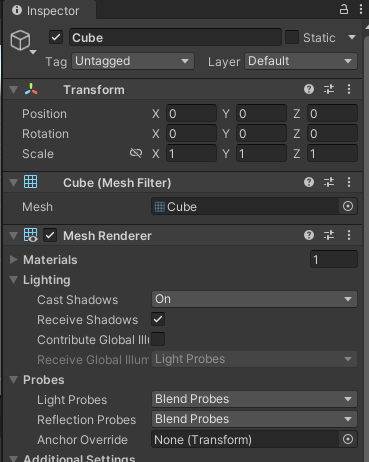
Inspector に注目します。
Add Component をクリックします。
New Script をクリックします。
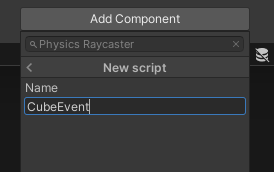
Name に CubeEvent を入力して Enter キーを押します。しばらく待ちます。
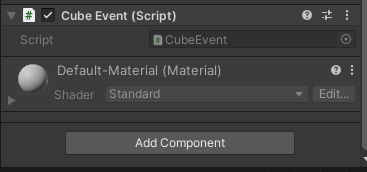
CubeEvent が作成されました。
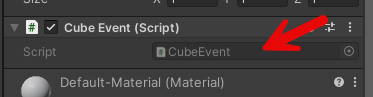
Script 項目の CubeEvent の部分をダブルクリックして CubeEvent のスクリプトを編集します。

Visual Studio が起動し CubeEvent が編集できるようになります。
CubeEvent.cs を全選択して、以下のスクリプトをコピーします。
using System.Collections;
using System.Collections.Generic;
using UnityEngine;
using UnityEngine.EventSystems;
using UnityEngine.Networking;
using System;
using System.IO;
using System.Text;

public class CubeEvent : MonoBehaviour, IPointerClickHandler
{
    // マイクの開始・終了管理
    bool flagMicRecordStart = false;

    // マイクデバイスがキャッチできたかどうか
    bool catchedMicDevice = false;

    // 現在録音するマイクデバイス名
    string currentRecordingMicDeviceName = "null";

    // PC の録音のターゲットになるマイクデバイス名
    // これはお使いのデバイスで変わります
    // 完全一致でないと受け取れないので注意
    string recordingTargetMicDeviceName = "Krisp Microphone (Krisp Audio)";

    // ヘッダーサイズ
    int HeaderByteSize = 44;

    // BitsPerSample
    int BitsPerSample = 16;

    // AudioFormat
    int AudioFormat = 1;

    // 録音する AudioClip
    AudioClip recordedAudioClip;

    // サンプリング周波数
    int samplingFrequency = 44100;

    // 最大録音時間[sec]
    int maxTimeSeconds = 10;

    // Wav データ
    byte[] dataWav;

    // OpenAIAPIKey
    // WhisperAPI と ChatGPTAPI で共通
    string OpenAIAPIKey = "OpenAIAPIKey";

    // Wisper API で受信した JSON データを Unity で扱うデータにする WhisperAPIResponseData ベースクラス
    [Serializable]
    public class WhisperAPIResponseData
    {
        public string text;
    }

    // ChatGPT API で受信した JSON データを Unity で扱うデータにする ResponseData ベースクラス
    // API仕様 : https://platform.openai.com/docs/api-reference/completions/object
    [Serializable]
    public class ResponseData
    {
        public string id;
        public string @object; // object は予約語なので @ を使ってエスケープしています
        public int created;
        public List<ResponseDataChoice> choices;
        public ResponseDataUsage usage;
    }

    [Serializable]
    public class ResponseDataUsage
    {
        public int prompt_tokens;
        public int completion_tokens;
        public int total_tokens;
    }
    [Serializable]
    public class ResponseDataChoice
    {
        public int index;
        public RequestDataMessages message;
        public string finish_reason;
    }

    // ChatGPT API に送信する Unity データを JSON データ化する RequestData ベースクラス
    [Serializable]
    public class RequestData
    {
        public string model;
        public List<RequestDataMessages> messages;
    }

    [Serializable]
    public class RequestDataMessages
    {
        public string role;
        public string content;
    }


    void Start()
    {
        catchedMicDevice = false;

        Launch();
    }

    void Launch()
    {

        // マイクデバイスを探す
        foreach (string device in Microphone.devices)
        {
            Debug.Log($"Mic device name : {device}");

            // PC 用のマイクデバイスを割り当て
            if (device == recordingTargetMicDeviceName)
            {
                Debug.Log($"{recordingTargetMicDeviceName} searched");

                currentRecordingMicDeviceName = device;

                catchedMicDevice = true;
            }

        }

        if (catchedMicDevice)
        {
            Debug.Log($"マイク捜索成功");
            Debug.Log($"currentRecordingMicDeviceName : {currentRecordingMicDeviceName}");
        }
        else
        {
            Debug.Log($"マイク捜索失敗");
        }

    }

    void Update()
    {

    }
    public void OnPointerClick(PointerEventData eventData)
    {
        if (catchedMicDevice)
        {
            if (flagMicRecordStart)
            {
                // Stop
                // マイクの録音を開始
                flagMicRecordStart = false;
                Debug.Log($"Mic Record Stop");

                RecordStop();

            }
            else
            {
                // Start
                // マイクの停止
                flagMicRecordStart = true;
                Debug.Log($"Mic Record Start");

                RecordStart();
            }
        }

    }

    void RecordStart()
    {
        // マイクの録音を開始して AudioClip を割り当て
        recordedAudioClip = Microphone.Start(currentRecordingMicDeviceName, false, maxTimeSeconds, samplingFrequency);
    }

    void RecordStop()
    {
        // マイクの停止
        Microphone.End(currentRecordingMicDeviceName);

        Debug.Log($"WAV データ作成開始");

        // using を使ってメモリ開放を自動で行う
        using (MemoryStream currentMemoryStream = new MemoryStream())
        {
            // ChunkID RIFF
            byte[] bufRIFF = Encoding.ASCII.GetBytes("RIFF");
            currentMemoryStream.Write(bufRIFF, 0, bufRIFF.Length);

            // ChunkSize
            byte[] bufChunkSize = BitConverter.GetBytes((UInt32)(HeaderByteSize + recordedAudioClip.samples * recordedAudioClip.channels * BitsPerSample / 8));
            currentMemoryStream.Write(bufChunkSize, 0, bufChunkSize.Length);

            // Format WAVE
            byte[] bufFormatWAVE = Encoding.ASCII.GetBytes("WAVE");
            currentMemoryStream.Write(bufFormatWAVE, 0, bufFormatWAVE.Length);

            // Subchunk1ID fmt
            byte[] bufSubchunk1ID = Encoding.ASCII.GetBytes("fmt ");
            currentMemoryStream.Write(bufSubchunk1ID, 0, bufSubchunk1ID.Length);

            // Subchunk1Size (16 for PCM)
            byte[] bufSubchunk1Size = BitConverter.GetBytes((UInt32)16);
            currentMemoryStream.Write(bufSubchunk1Size, 0, bufSubchunk1Size.Length);

            // AudioFormat (PCM=1)
            byte[] bufAudioFormat = BitConverter.GetBytes((UInt16)AudioFormat);
            currentMemoryStream.Write(bufAudioFormat, 0, bufAudioFormat.Length);

            // NumChannels
            byte[] bufNumChannels = BitConverter.GetBytes((UInt16)recordedAudioClip.channels);
            currentMemoryStream.Write(bufNumChannels, 0, bufNumChannels.Length);

            // SampleRate
            byte[] bufSampleRate = BitConverter.GetBytes((UInt32)recordedAudioClip.frequency);
            currentMemoryStream.Write(bufSampleRate, 0, bufSampleRate.Length);

            // ByteRate (=SampleRate * NumChannels * BitsPerSample/8)
            byte[] bufByteRate = BitConverter.GetBytes((UInt32)(recordedAudioClip.samples * recordedAudioClip.channels * BitsPerSample / 8));
            currentMemoryStream.Write(bufByteRate, 0, bufByteRate.Length);

            // BlockAlign (=NumChannels * BitsPerSample/8)
            byte[] bufBlockAlign = BitConverter.GetBytes((UInt16)(recordedAudioClip.channels * BitsPerSample / 8));
            currentMemoryStream.Write(bufBlockAlign, 0, bufBlockAlign.Length);

            // BitsPerSample
            byte[] bufBitsPerSample = BitConverter.GetBytes((UInt16)BitsPerSample);
            currentMemoryStream.Write(bufBitsPerSample, 0, bufBitsPerSample.Length);

            // Subchunk2ID data
            byte[] bufSubchunk2ID = Encoding.ASCII.GetBytes("data");
            currentMemoryStream.Write(bufSubchunk2ID, 0, bufSubchunk2ID.Length);

            // Subchuk2Size
            byte[] bufSubchuk2Size = BitConverter.GetBytes((UInt32)(recordedAudioClip.samples * recordedAudioClip.channels * BitsPerSample / 8));
            currentMemoryStream.Write(bufSubchuk2Size, 0, bufSubchuk2Size.Length);

            // Data
            float[] floatData = new float[recordedAudioClip.samples * recordedAudioClip.channels];
            recordedAudioClip.GetData(floatData, 0);

            foreach (float f in floatData)
            {
                byte[] bufData = BitConverter.GetBytes((short)(f * short.MaxValue));
                currentMemoryStream.Write(bufData, 0, bufData.Length);
            }

            Debug.Log($"WAV データ作成完了");

            dataWav = currentMemoryStream.ToArray();

            Debug.Log($"dataWav.Length {dataWav.Length}");

            // まず Wisper API で文字起こし
            StartCoroutine(PostWhisperAPI());

        }

    }

    // Wisper API で文字起こし
    IEnumerator PostWhisperAPI()
    {
        // IMultipartFormSection で multipart/form-data のデータとして送れます
        // https://docs.unity3d.com/ja/2018.4/Manual/UnityWebRequest-SendingForm.html
        // https://docs.unity3d.com/ja/2019.4/ScriptReference/Networking.IMultipartFormSection.html
        // https://docs.unity3d.com/ja/2020.3/ScriptReference/Networking.MultipartFormDataSection.html
        List<IMultipartFormSection> formData = new List<IMultipartFormSection>();

        // https://platform.openai.com/docs/api-reference/audio/createTranscription
        // Whisper モデルを使う
        formData.Add(new MultipartFormDataSection("model", "whisper-1"));
        // 日本語で返答
        formData.Add(new MultipartFormDataSection("language", "ja"));
        // WAV データを入れる
        formData.Add(new MultipartFormFileSection("file", dataWav, "whisper01.wav", "multipart/form-data"));

        // HTTP リクエストする(POST メソッド) UnityWebRequest を呼び出し
        // 第 2 引数で上記のフォームデータを割り当てて multipart/form-data のデータとして送ります
        string urlWhisperAPI = "https://api.openai.com/v1/audio/transcriptions";
        UnityWebRequest request = UnityWebRequest.Post(urlWhisperAPI, formData);

        // OpenAI 認証は Authorization ヘッダーで Bearer のあとに API トークンを入れる
        request.SetRequestHeader("Authorization", $"Bearer {OpenAIAPIKey}");

        // ダウンロード(サーバ→Unity)のハンドラを作成
        request.downloadHandler = new DownloadHandlerBuffer();

        Debug.Log("WhisperAPI リクエスト開始");

        // リクエスト開始
        yield return request.SendWebRequest();


        // 結果によって分岐
        switch (request.result)
        {
            case UnityWebRequest.Result.InProgress:
                Debug.Log("WhisperAPI リクエスト中");
                break;

            case UnityWebRequest.Result.ProtocolError:
                Debug.Log("ProtocolError");
                Debug.Log(request.responseCode);
                Debug.Log(request.error);
                break;

            case UnityWebRequest.Result.ConnectionError:
                Debug.Log("ConnectionError");
                break;

            case UnityWebRequest.Result.Success:
                Debug.Log("WhisperAPI リクエスト成功");

                // コンソールに表示
                Debug.Log($"responseData: {request.downloadHandler.text}");

                WhisperAPIResponseData resultResponseWhisperAPI = JsonUtility.FromJson<WhisperAPIResponseData>(request.downloadHandler.text);

                // テキストが起こせたら ChatGPT API に聞く
                StartCoroutine(PostChatGPT(resultResponseWhisperAPI.text));

                break;
        }


    }

    // ChatGPT API
    IEnumerator PostChatGPT(string text)
    {
        // HTTP リクエストする(POST メソッド) UnityWebRequest を呼び出し
        // リクエスト仕様 : https://platform.openai.com/docs/guides/gpt/chat-completions-api
        // API仕様 : https://platform.openai.com/docs/api-reference/completions/object
        UnityWebRequest request = new UnityWebRequest("https://api.openai.com/v1/chat/completions", "POST");

        RequestData requestData = new RequestData();
        // データを設定
        requestData.model = "gpt-4o-mini";
        RequestDataMessages currentMessage = new RequestDataMessages();
        // ロールは user
        currentMessage.role = "user";
        // 実際の質問
        currentMessage.content = text;
        List<RequestDataMessages> currentMessages = new List<RequestDataMessages>();
        currentMessages.Add(currentMessage);
        requestData.messages = currentMessages;
        Debug.Log($"currentMessages[0].content : {currentMessages[0].content}");

        // 送信データを JsonUtility.ToJson で JSON 文字列を作成
        // RequestData, RequestDataMessages の構造に基づいて変換してくれる
        string strJSON = JsonUtility.ToJson(requestData);
        Debug.Log($"strJSON : {strJSON}");
        // 送信データを Encoding.UTF8.GetBytes で byte データ化
        byte[] bodyRaw = Encoding.UTF8.GetBytes(strJSON);

        // アップロード(Unity→サーバ)のハンドラを作成
        request.uploadHandler = new UploadHandlerRaw(bodyRaw);
        // ダウンロード(サーバ→Unity)のハンドラを作成
        request.downloadHandler = new DownloadHandlerBuffer();

        // JSON で送ると HTTP ヘッダーで宣言する
        request.SetRequestHeader("Content-Type", "application/json");
        // ChatGPT 用の認証を伝える設定
        request.SetRequestHeader("Authorization", $"Bearer {OpenAIAPIKey}");

        // リクエスト開始
        yield return request.SendWebRequest();

        Debug.Log("ChatGPT リクエスト...");

        // 結果によって分岐
        switch (request.result)
        {
            case UnityWebRequest.Result.InProgress:
                Debug.Log("ChatGPT リクエスト中");
                break;

            case UnityWebRequest.Result.ProtocolError:
                Debug.Log("ProtocolError");
                Debug.Log(request.responseCode);
                Debug.Log(request.error);
                break;

            case UnityWebRequest.Result.ConnectionError:
                Debug.Log("ConnectionError");
                break;

            case UnityWebRequest.Result.Success:
                Debug.Log("ChatGPT リクエスト成功");

                // コンソールに表示
                Debug.Log($"responseData: {request.downloadHandler.text}");

                ResponseData resultResponse = JsonUtility.FromJson<ResponseData>(request.downloadHandler.text);

                // 返答
                Debug.Log($"resultResponse.choices[0].message : {resultResponse.choices[0].message.content}");

                break;
        }

        request.Dispose();
    }
}
うまく上書きできたら、
// OpenAIAPIKey
string OpenAIAPIKey = "OpenAIAPIKey";
こちらを授業中にシェアした OpenAI の APIKey で置き換えます。
たとえば ABCDEGHIJKLMNNABCDEGHIJKLMNN の OpenAIAPIKey であれば、
// OpenAIAPIKey
string OpenAIAPIKey = "ABCDEGHIJKLMNNABCDEGHIJKLMNN";
とダブルクォーテーション " の中を変更します。
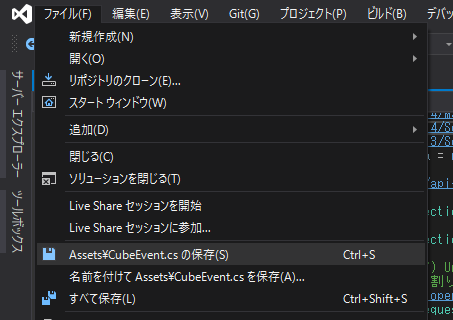
一旦保存します。
Unity に戻ります。
今回録音するマイクデバイスを狙う
    // PC の録音のターゲットになるマイクデバイス名
    // これはお使いのデバイスで変わります
    // 完全一致でないと受け取れないので注意
    string recordingTargetMicDeviceName = "Krisp Microphone (Krisp Audio)";
現状だと、ブログ用の仮の Krisp Microphone (Krisp Audio) が入っています。これはお使いのデバイスで変わりますので Console でマイク一覧を見ながら、今回録音するマイクデバイスを探しましょう。
動かす前に、動作ログが出る Console タブをクリックしておきます。
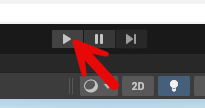
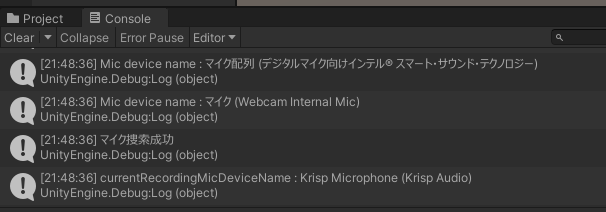
上部の Play ボタンをクリックします。
再生されます。
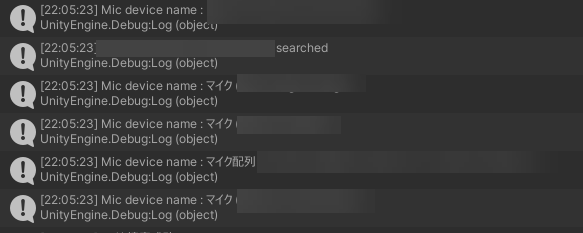
ログにマイク一覧が出てきます。普段 Zoom や Teams などで使っているマイクデバイスが見つかりましたか?
見つかったら、そのマイクの行をコンソールでクリックします。

マイク名を選択してコピーします。
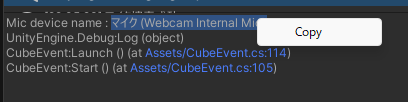
右クリックでコピーできます。
    // PC の録音のターゲットになるマイクデバイス名
    // これはお使いのデバイスで変わります
    // 完全一致でないと受け取れないので注意
    string recordingTargetMicDeviceName = "Krisp Microphone (Krisp Audio)";
これを Visual Studio で開いてある Cube Event のこの部分を変更します。
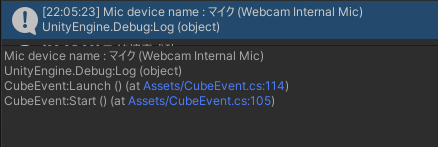
たとえば マイク (Webcam Internal Mic) であれば、
    // PC の録音のターゲットになるマイクデバイス名
    // これはお使いのデバイスで変わります
    // 完全一致でないと受け取れないので注意
    string recordingTargetMicDeviceName = "マイク (Webcam Internal Mic)";
として保存します。

保存を忘れないようにしましょう。
動かしてみる
Unity に戻ります。
上部の Play ボタンをクリックします。
再生されます。
今回録音するマイクが捜索できれば、マイク捜索成功とログが出ます。

Cube をマウスで直接クリックしてみます。
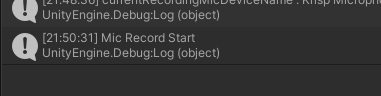
Console には Mic Record Start が出ます。録音開始です。「テスト」とでも話してみましょう。
もう一度 Cube をクリックしてマイク録音を停止します。
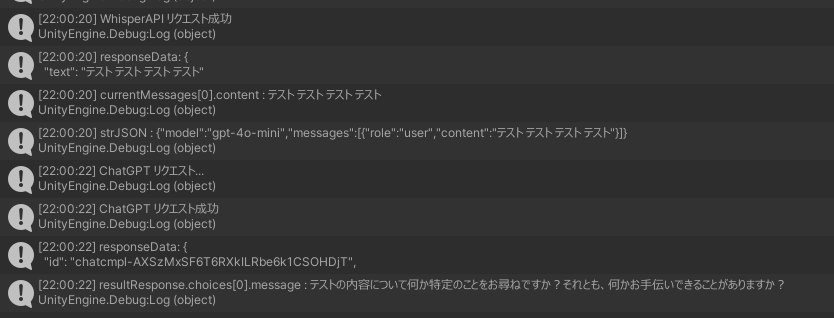
このように、OpenAI の Whisper API で音声が文字起こしされて「テスト」と結果表示されます。さらにその文字列をもとに ChatGPT に質問して返答が返ってきます!